Tutorial: Slanted Buttonhole Stitch
or how to make the butterflies in my last heart (the green one).
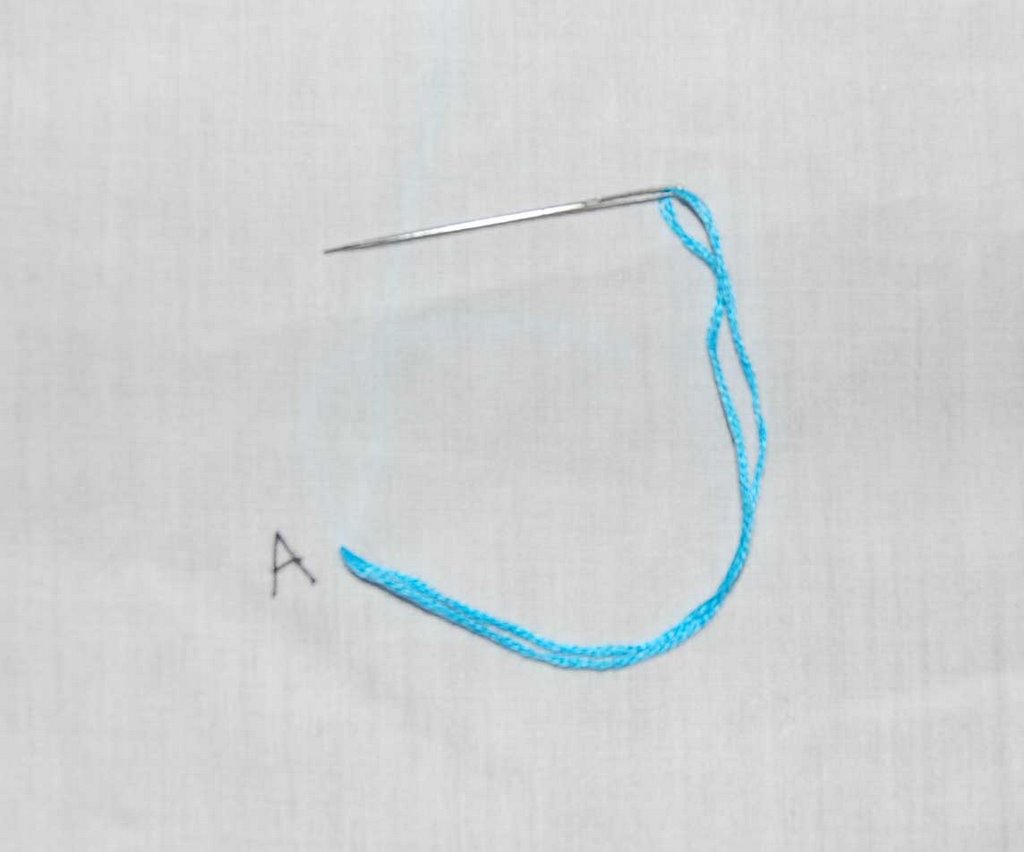
Step 1) Pull needle out at point A.
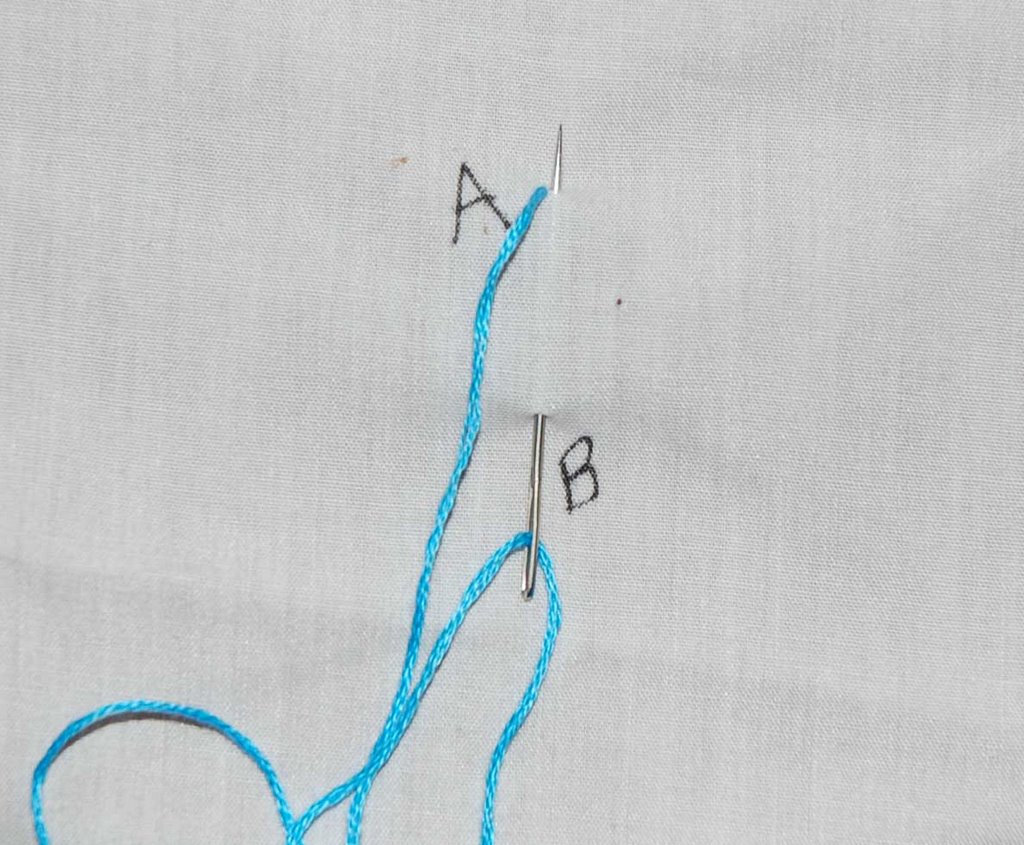
Step 2) Take a stitch from point B to point A.
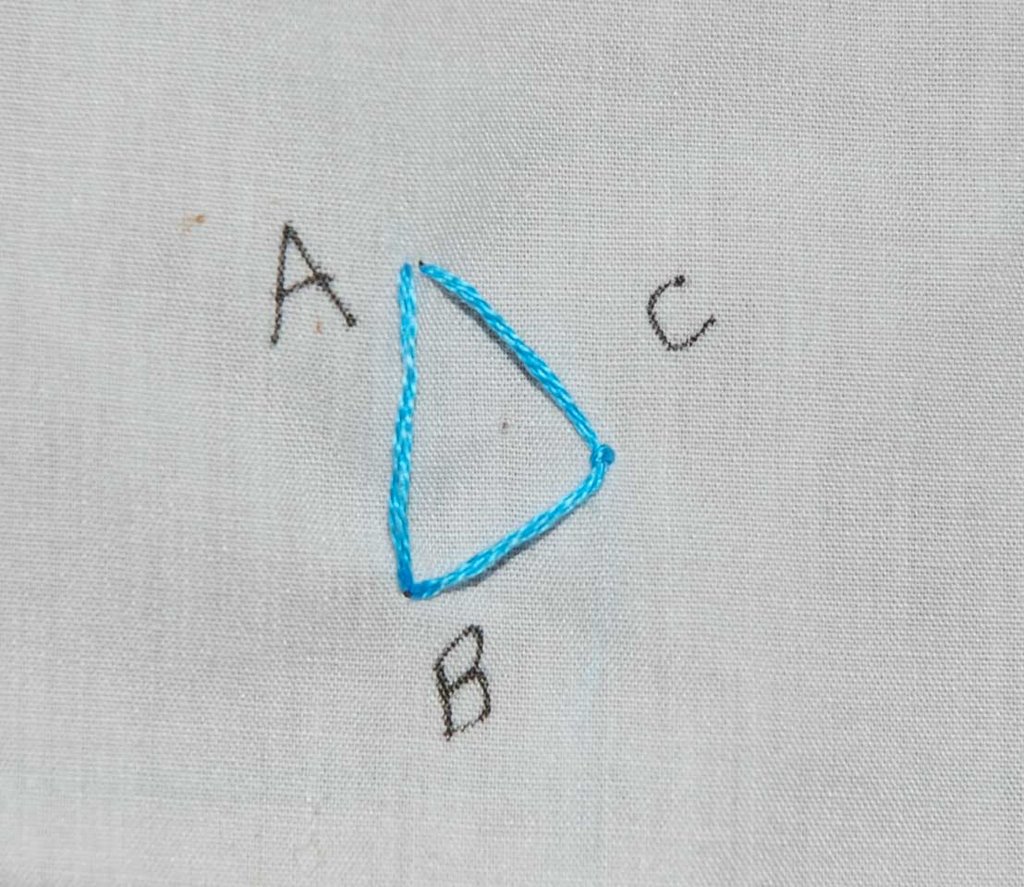
Step 3) Take a stitch from point B to point C - make sure that the loop of floss is UNDERNEATH your needle (similar to a blanket stitch).

Step 4) Pull triangle to desired tightness.
If you want to continue making triangles, go back to step 2. To finish, take a stitch over the floss to secure the last point. Here are some more variations of the slanted button hole stitch (sorry about the glare).
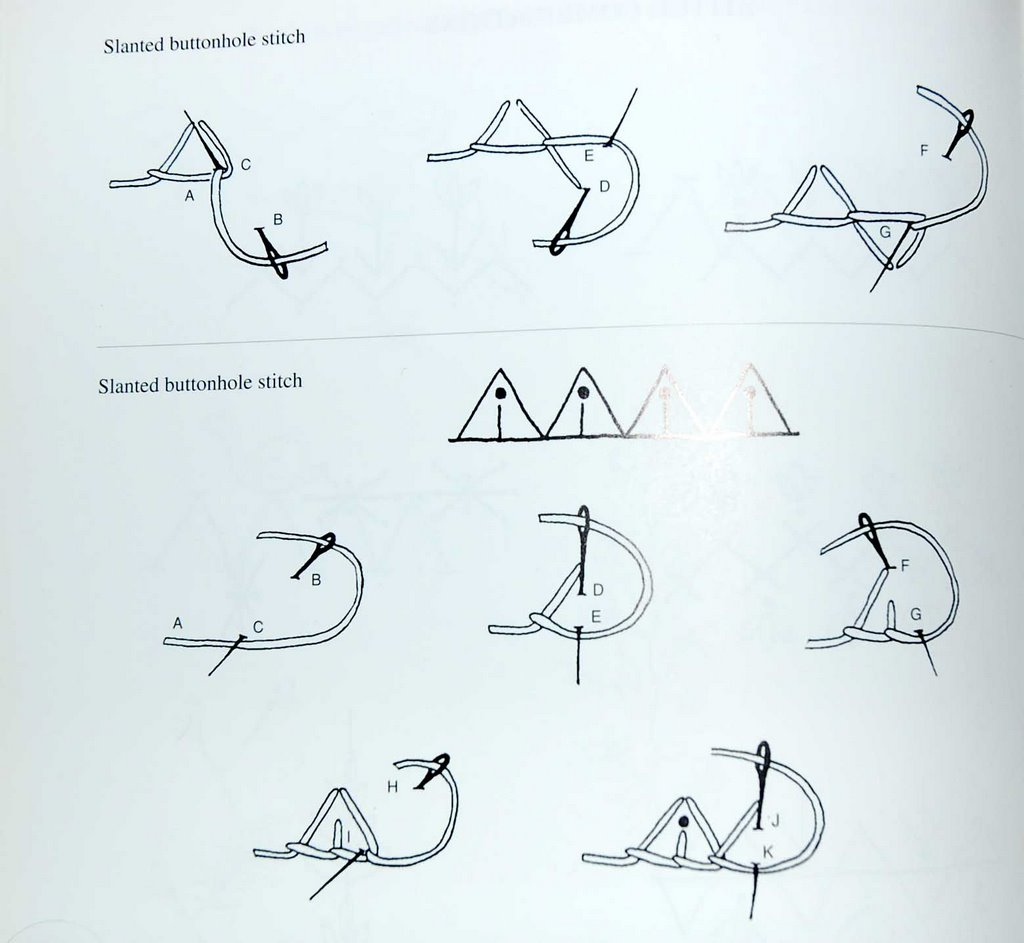
This is a page from Crazy Quilting by Christine Dabbs.
posted by Melissa @ 9:09 PM
![]()

0 Comments:
Post a Comment
<< Home